Amazon Redshift Data Warehouse
- Step 1: Create an AWS Account
- Step 2: Setup Billing Alarms
- Step 3: Create a Redshift Cluster
- Step 4: Update VPC for External Access
- Step 5: Create an IAM User
- Step 6: Configuring DBeaver
- Step 7: Load Data into S3
- Step 8: Loading Data into Redshift
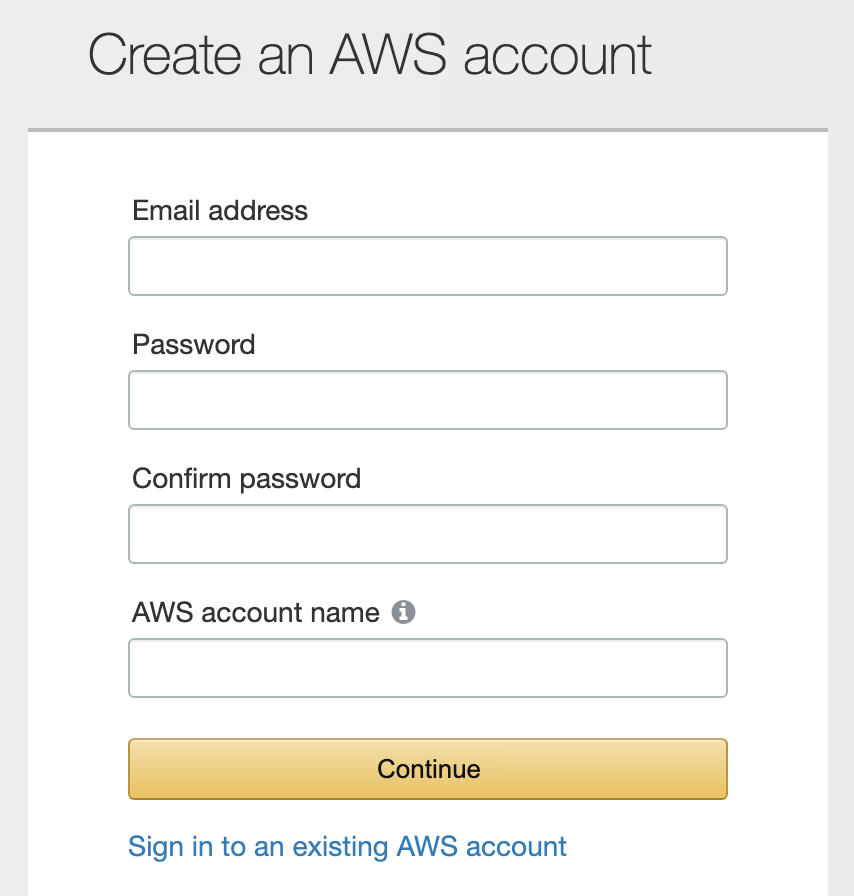
Step 1: Create an AWS Account
- Go to aws.amazon.com and create an account.

- Follow through with the payment information and identity verification.
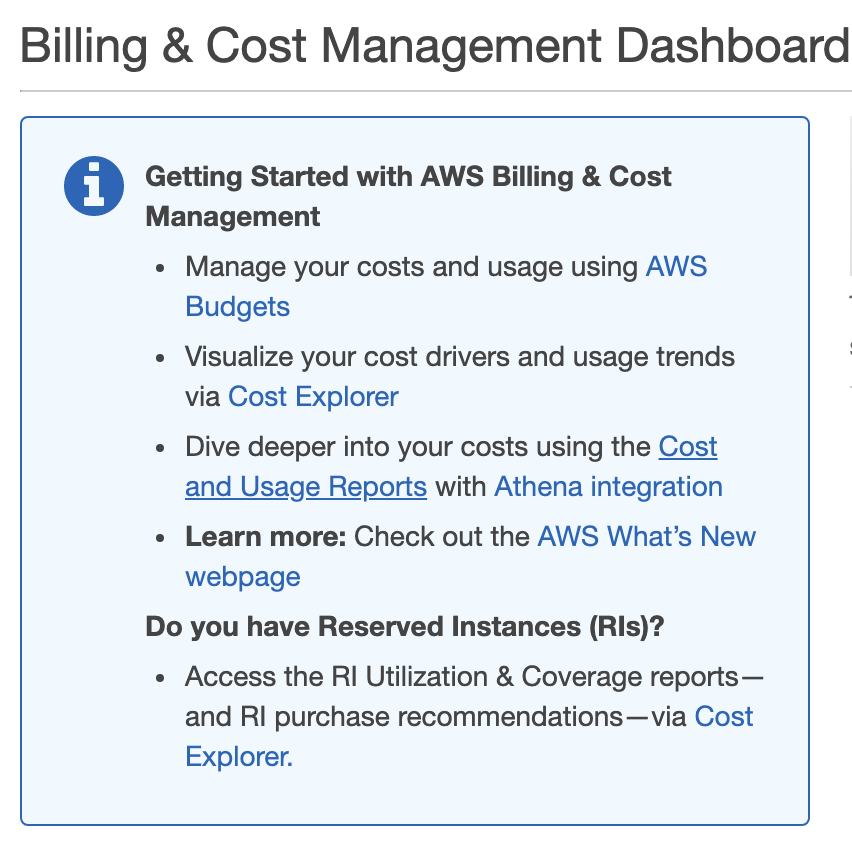
Step 2: Setup Billing Alarms
- Navigate to My Billing Dashboard from the top menu.
- Click on AWS Budgets.
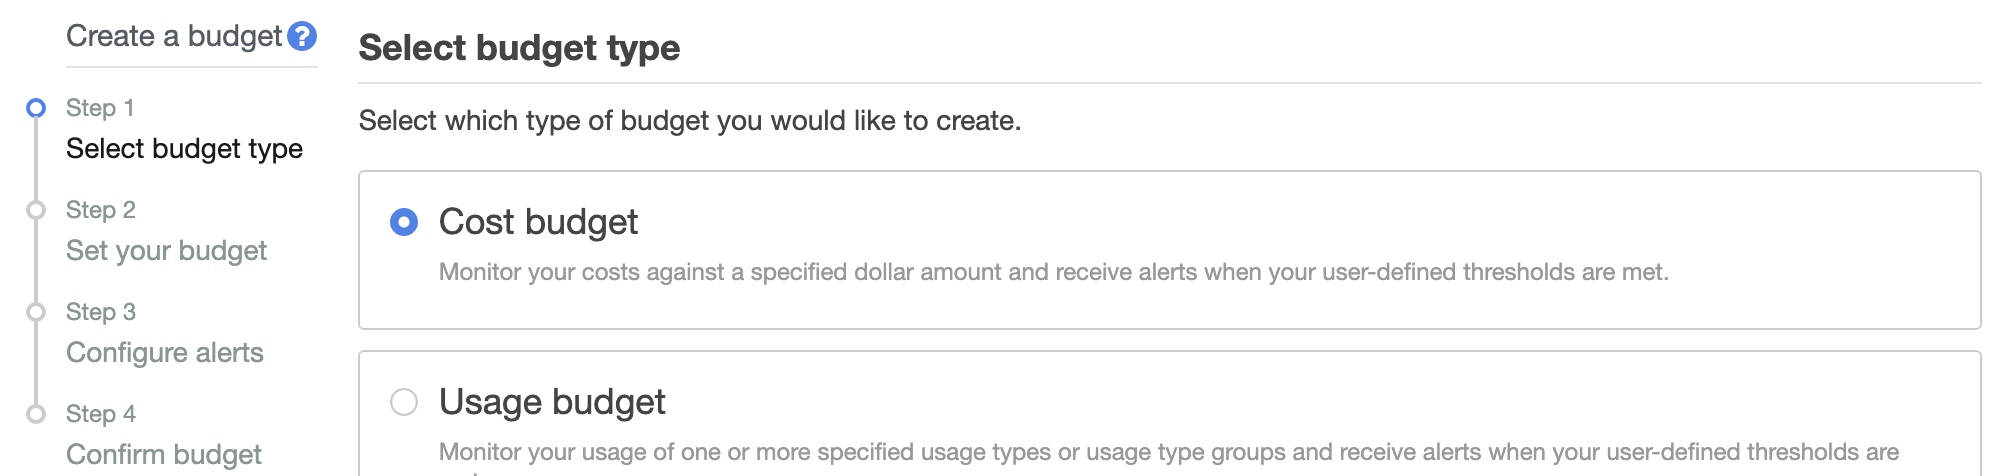
- Click on Create a budget.
- Choose your budget type. For this example, we’ll select Cost budget.
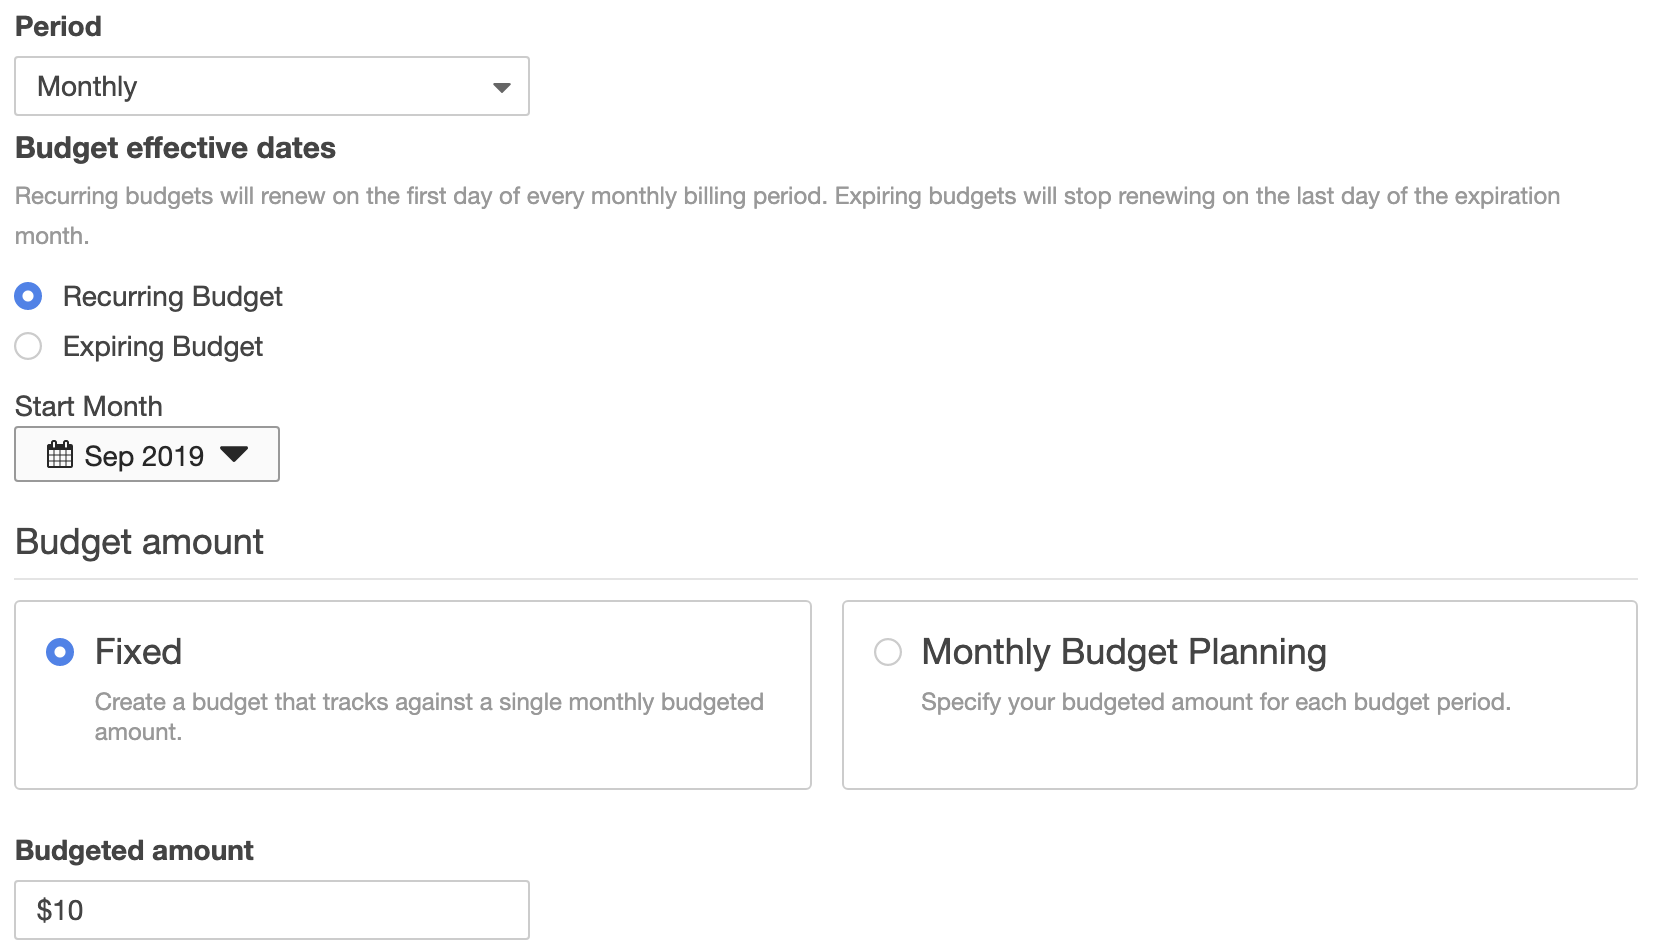
- Fill in the details at the Set your budget step. This is where you can specify the budget period (monthly or annually), and the budget amount.
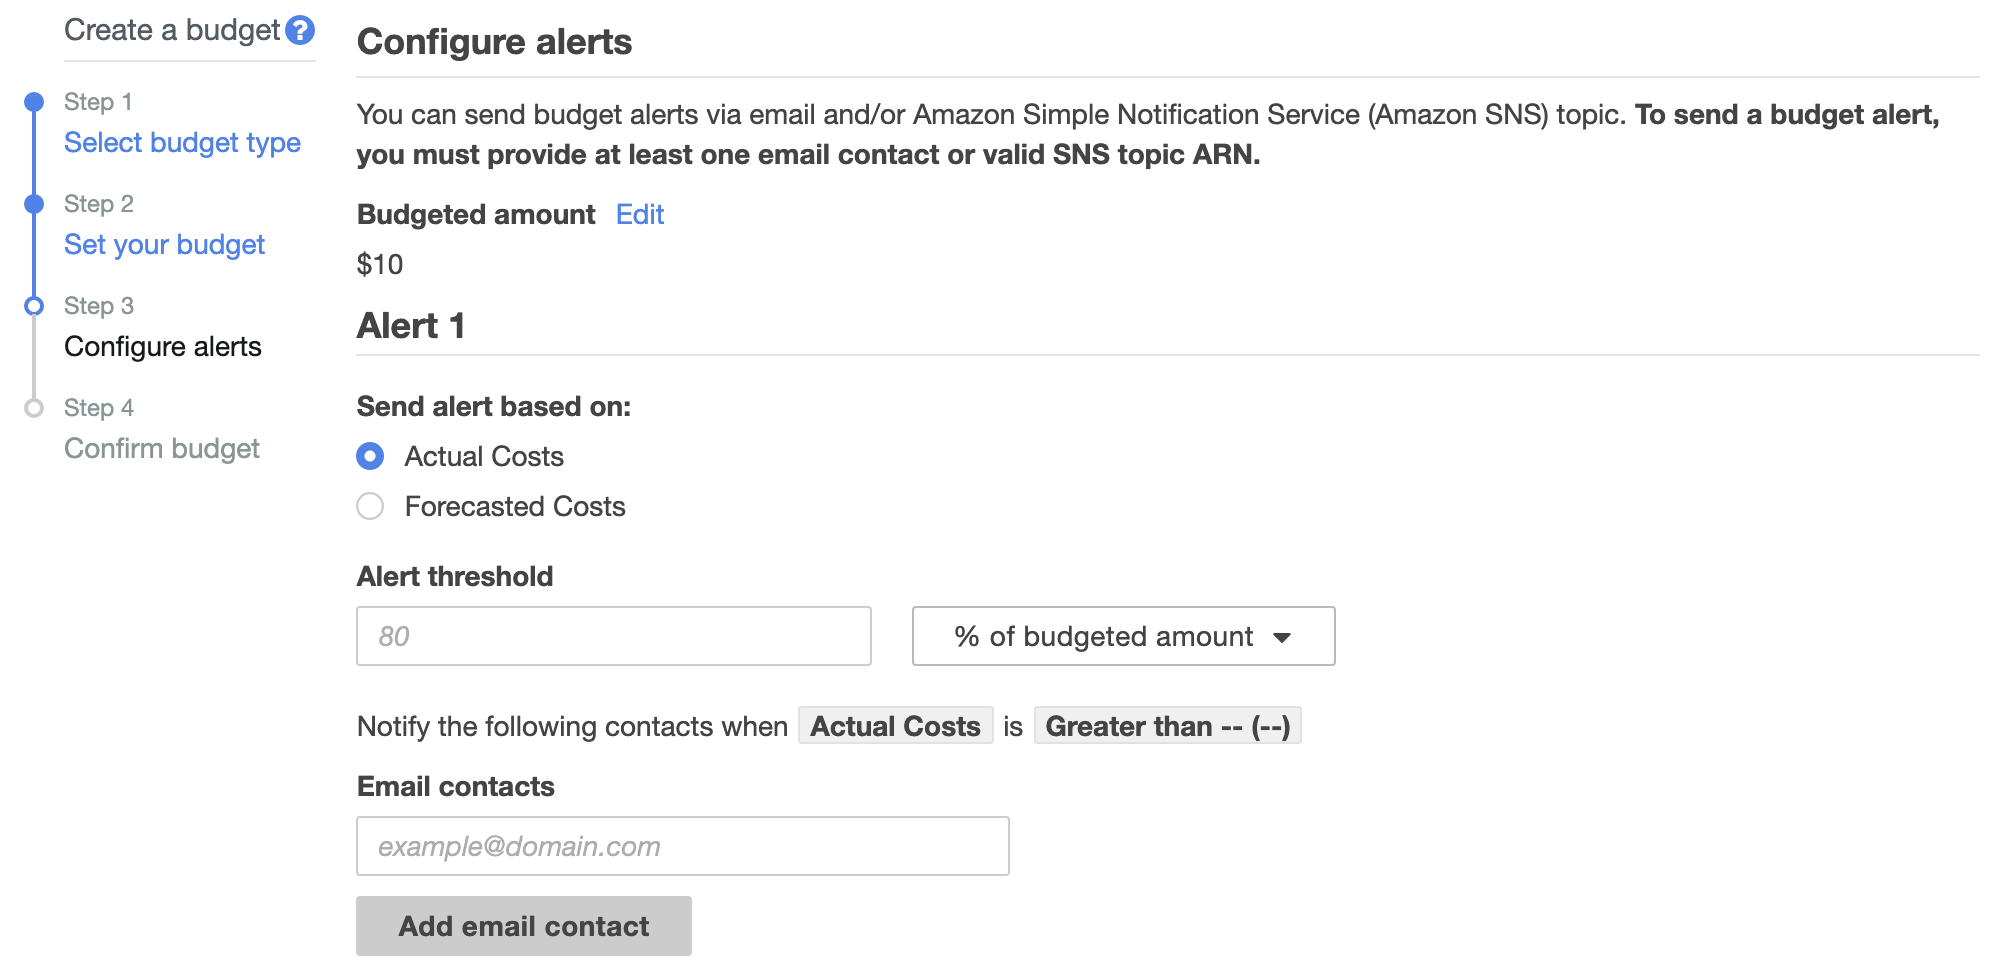
- When you’ve set your budget, scroll to the bottom and click Configure Alerts.
- At the Configure alerts screen, you can choose to send alerts based on actual costs or forecasted costs.
- We’ll set ours to Actual Costs, with an alert threshold of 80%.
- Type in the email address(es) you would like alerts to be sent to.
- Scroll to the bottom and click Confirm budget.
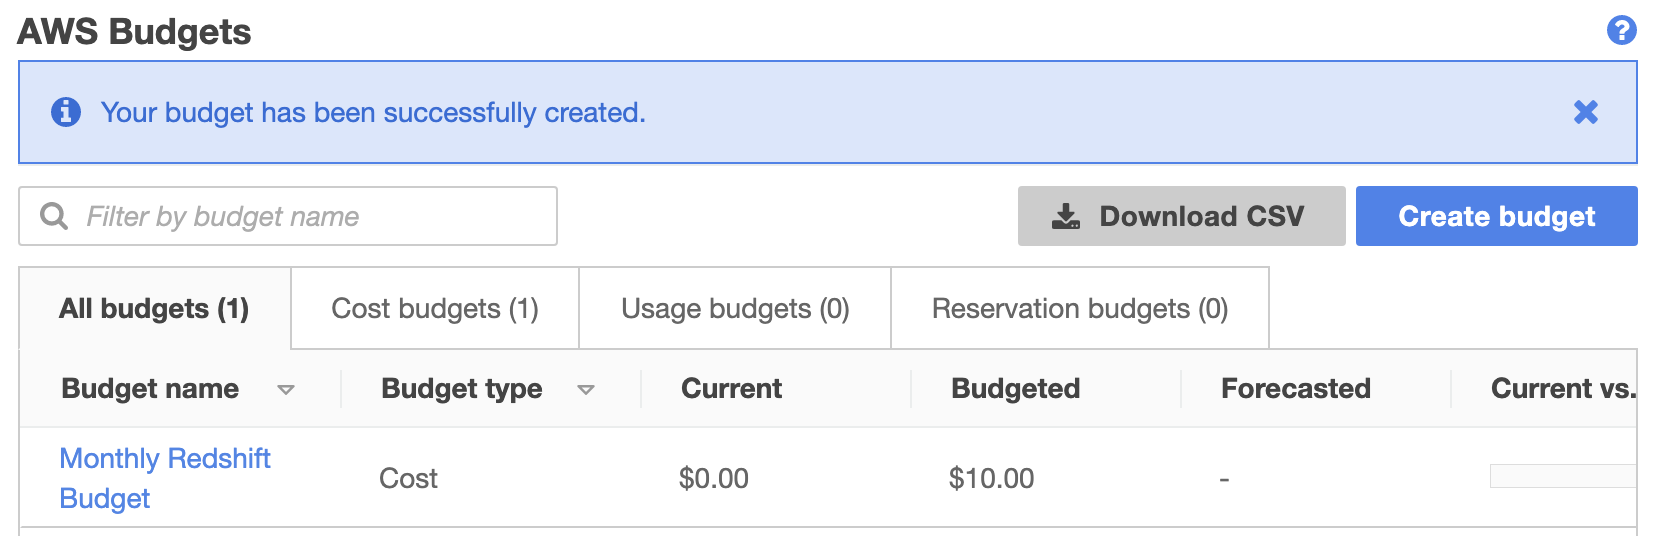
- Review the details on the screen, then click Create.
- You should now see a new entry in the AWS Budgets screen.
- We’ve only created one alarm at $10, but you’ll probably want to create others to alert you when you go over different limits. e.g. One at $10, one at $50, one at $100, depending on your estimated usage and budget.

Step 3: Create a Redshift Cluster
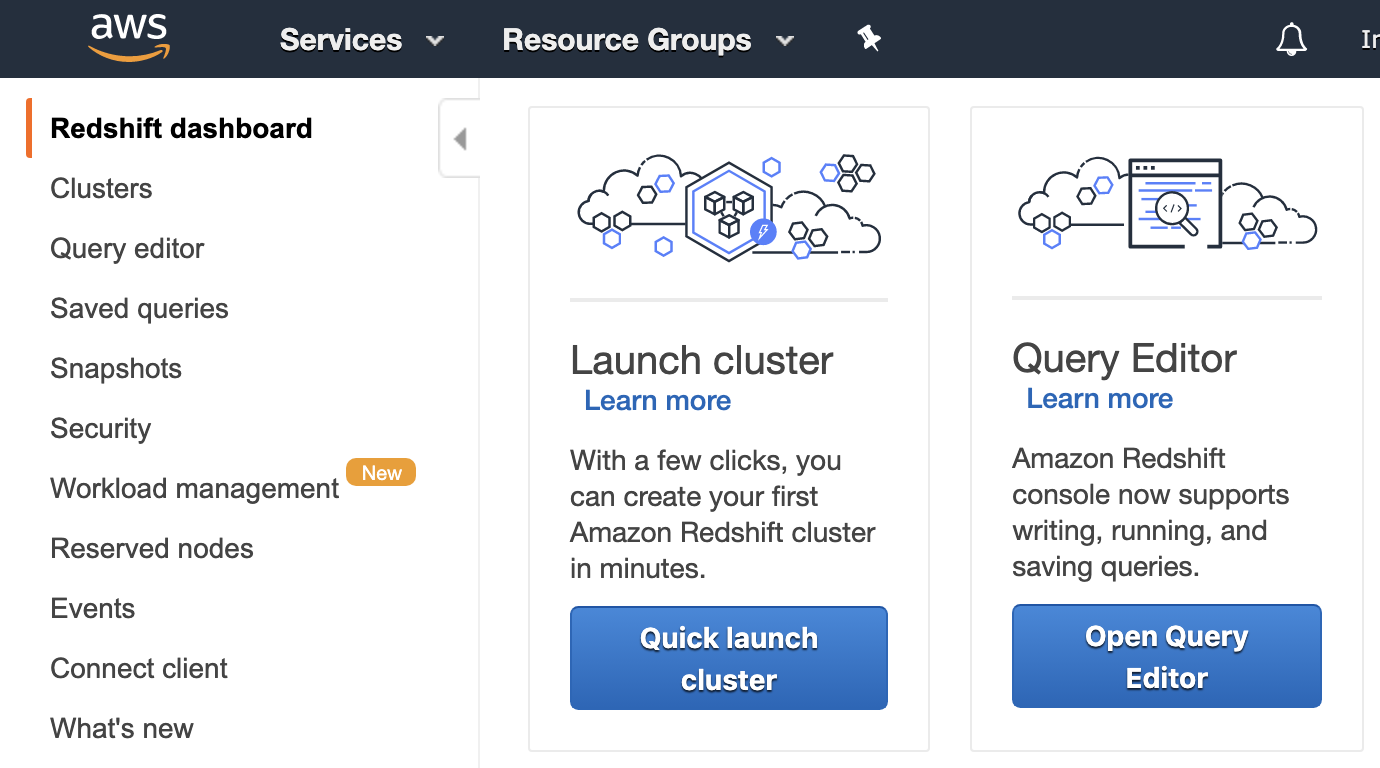
- Drop down the Services menu from the top of the page, and open the Amazon Redshift service
- Click on Quick launch cluster
- Take a note of the region you’re currently set to from the top right corner. We’ll use US East (Ohio).
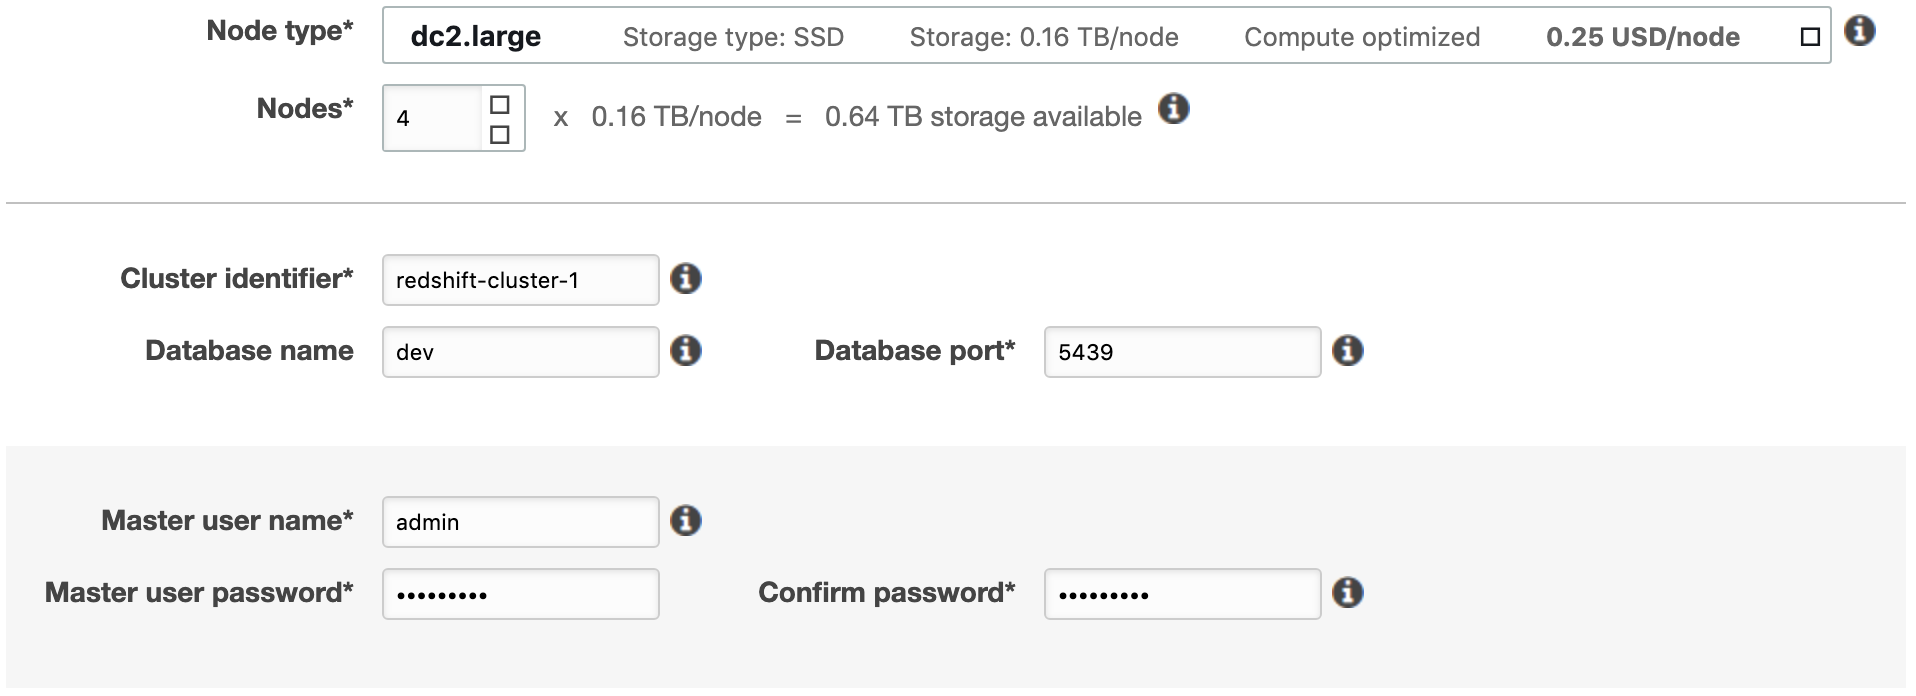
- Increase the number of nodes to 4
- Provide a value for the Cluster identifier field (following conventions*)
- Database port can be left as the default of 5439
- Provide a user name
- Provide a password, then confirm your password
- Click launch cluster (charges will begin once you push this button)

*lowercase string, words separated by hyphens.
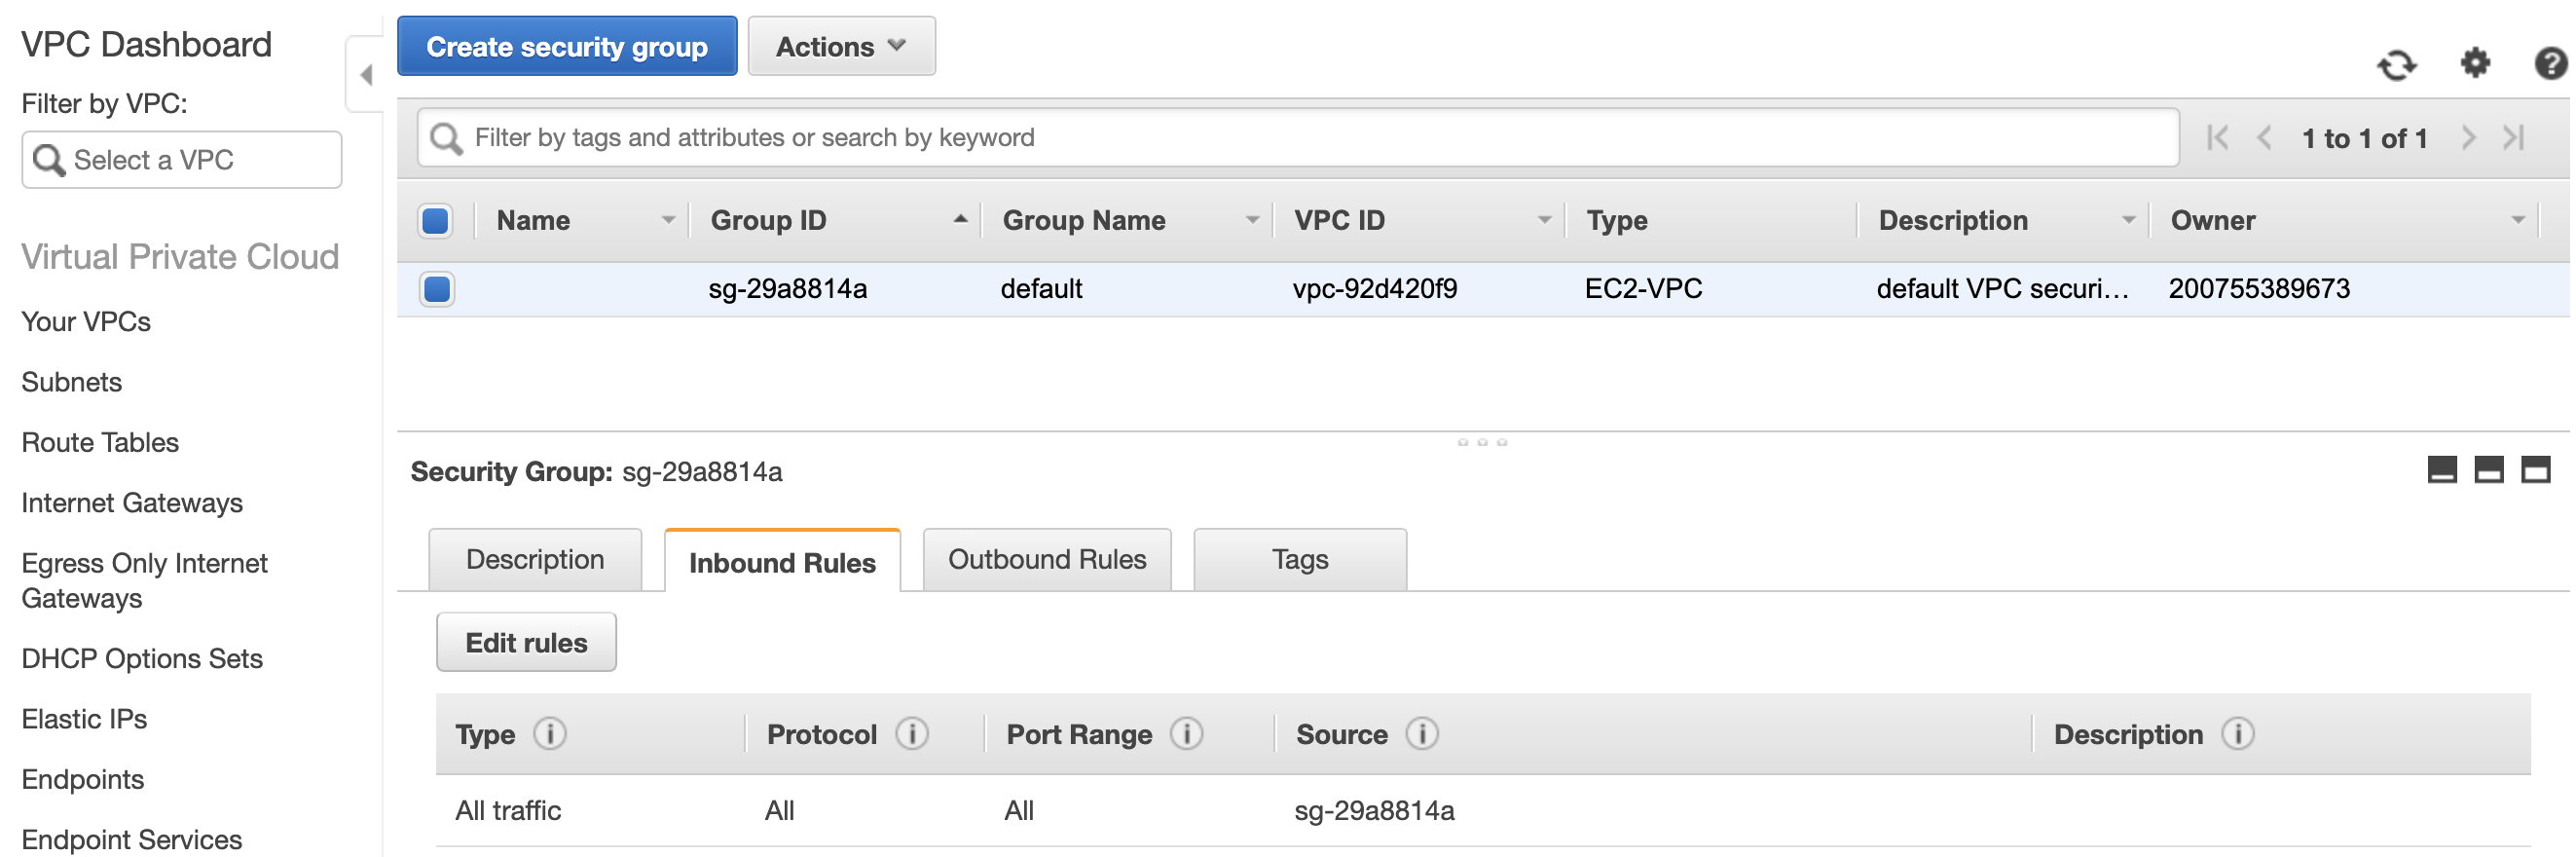
Step 4: Update VPC for External Access
- From the AWS Management Console, search for the VPC service
- From the VPC dashboard, select Security Groups on the left
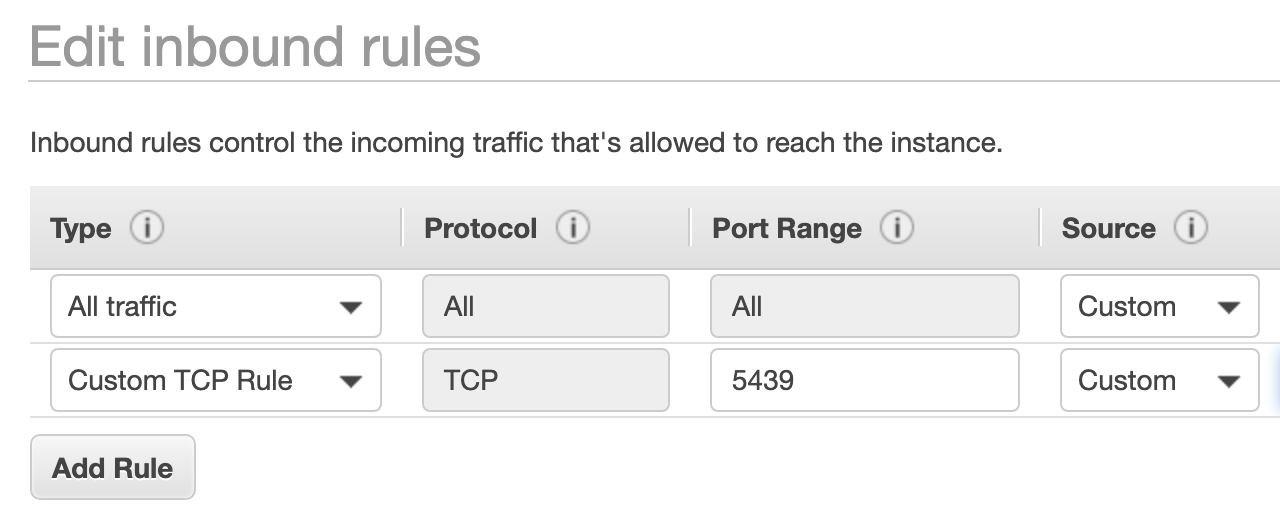
- To grant the DBeaver application access, click Edit rules
- Click Add Rule and leave the type as Custom TCP Rule
- Set the port to be 5439
- Set the source value to be your IPV4 address, followed by /32
- Save the rule
Step 5: Create an IAM User
- From the AWS Management Console, search for the IAM service
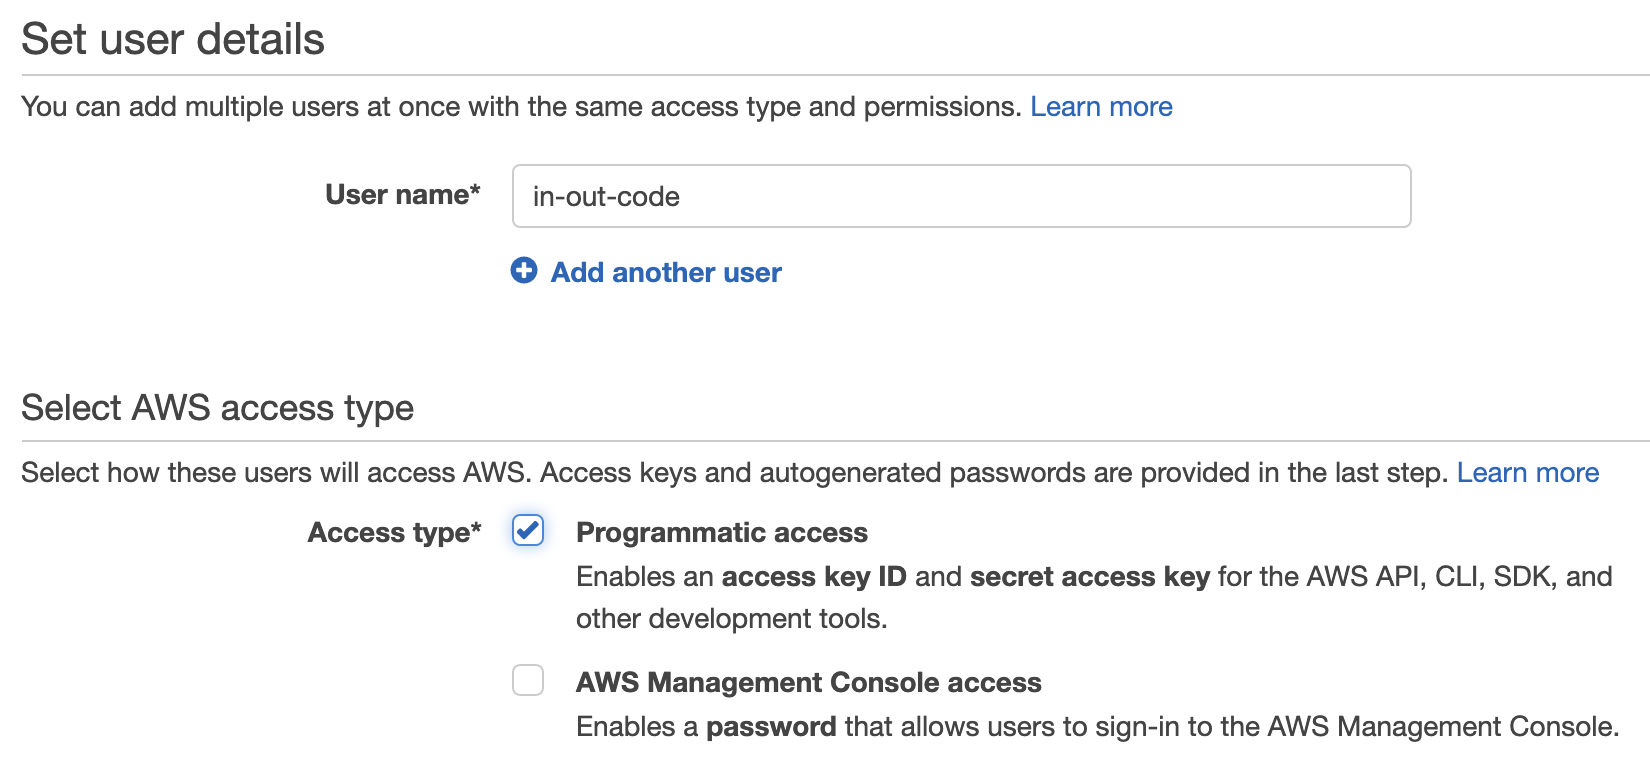
- Select Users from the menu on the left, then click Add user
- Provide a user name
- For the access type, select Programmatic access
- Click Next: Permissions
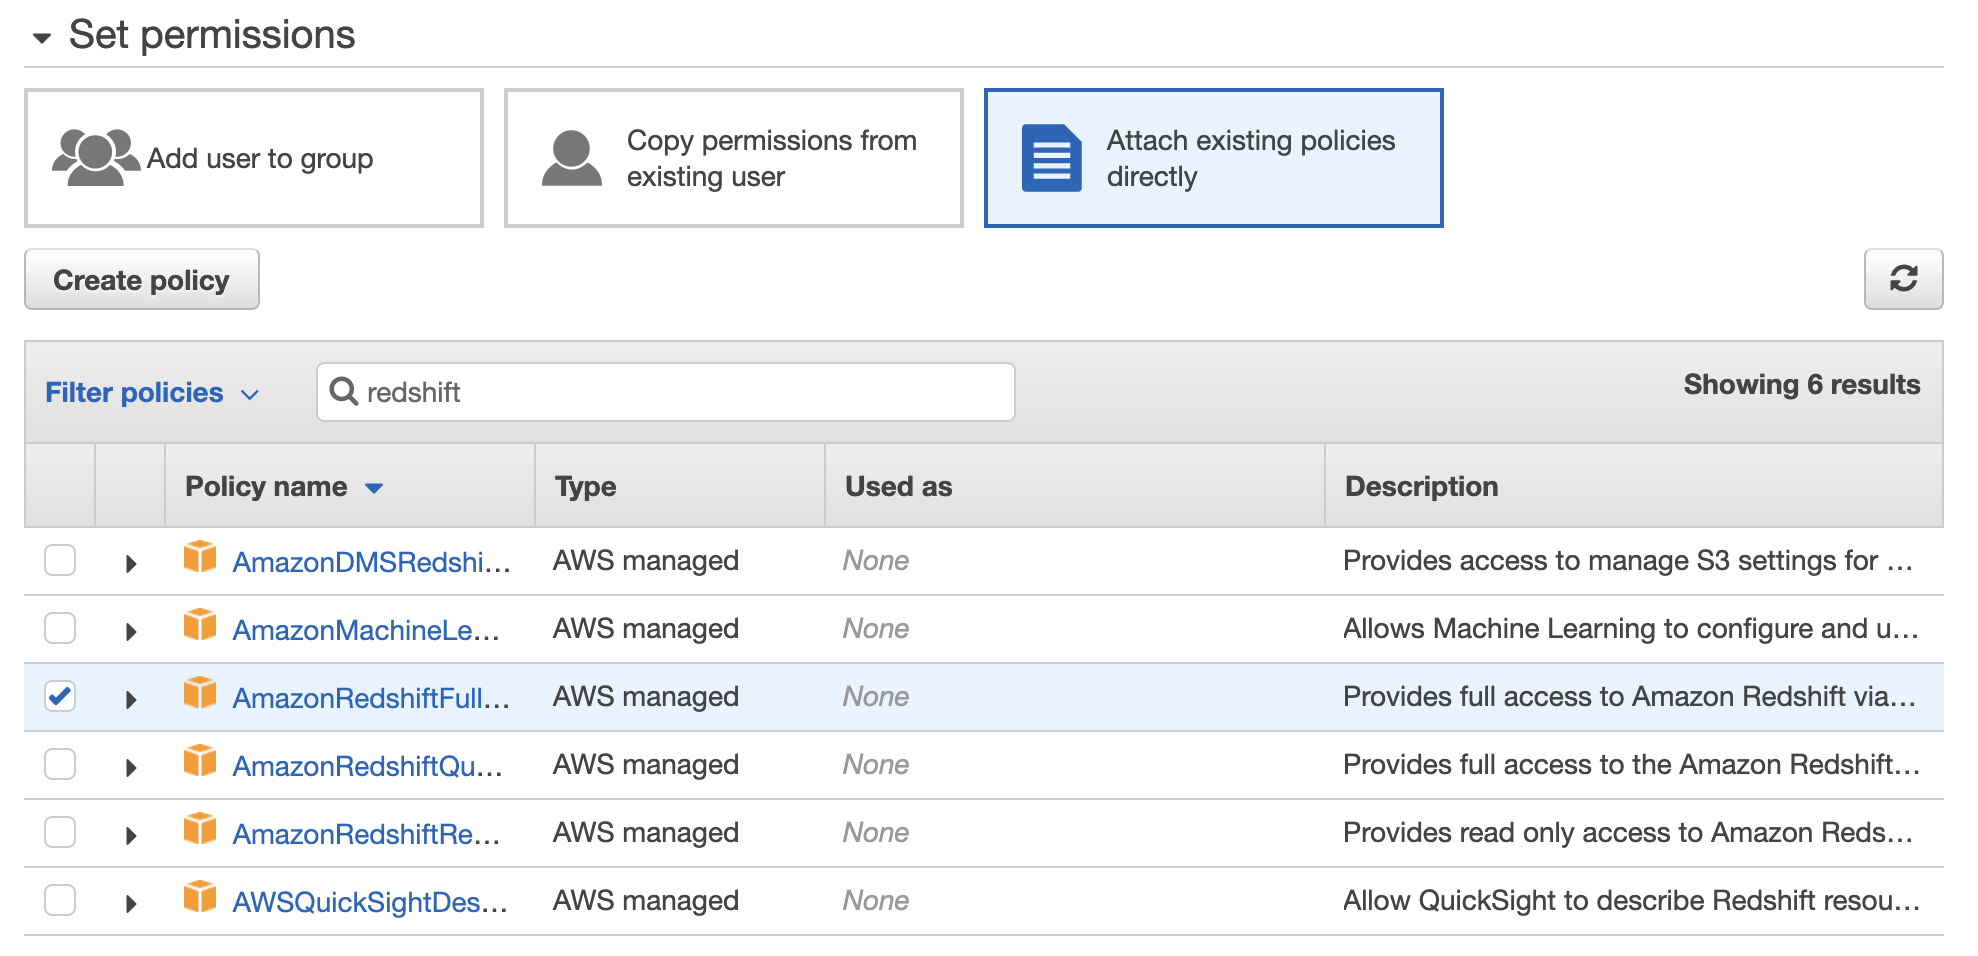
- Click on Attach existing policies directly
- Search for redshift. Click on the AmazonRedshiftFullAccess policy name
- Click Next: Tags
- Click Next: Review
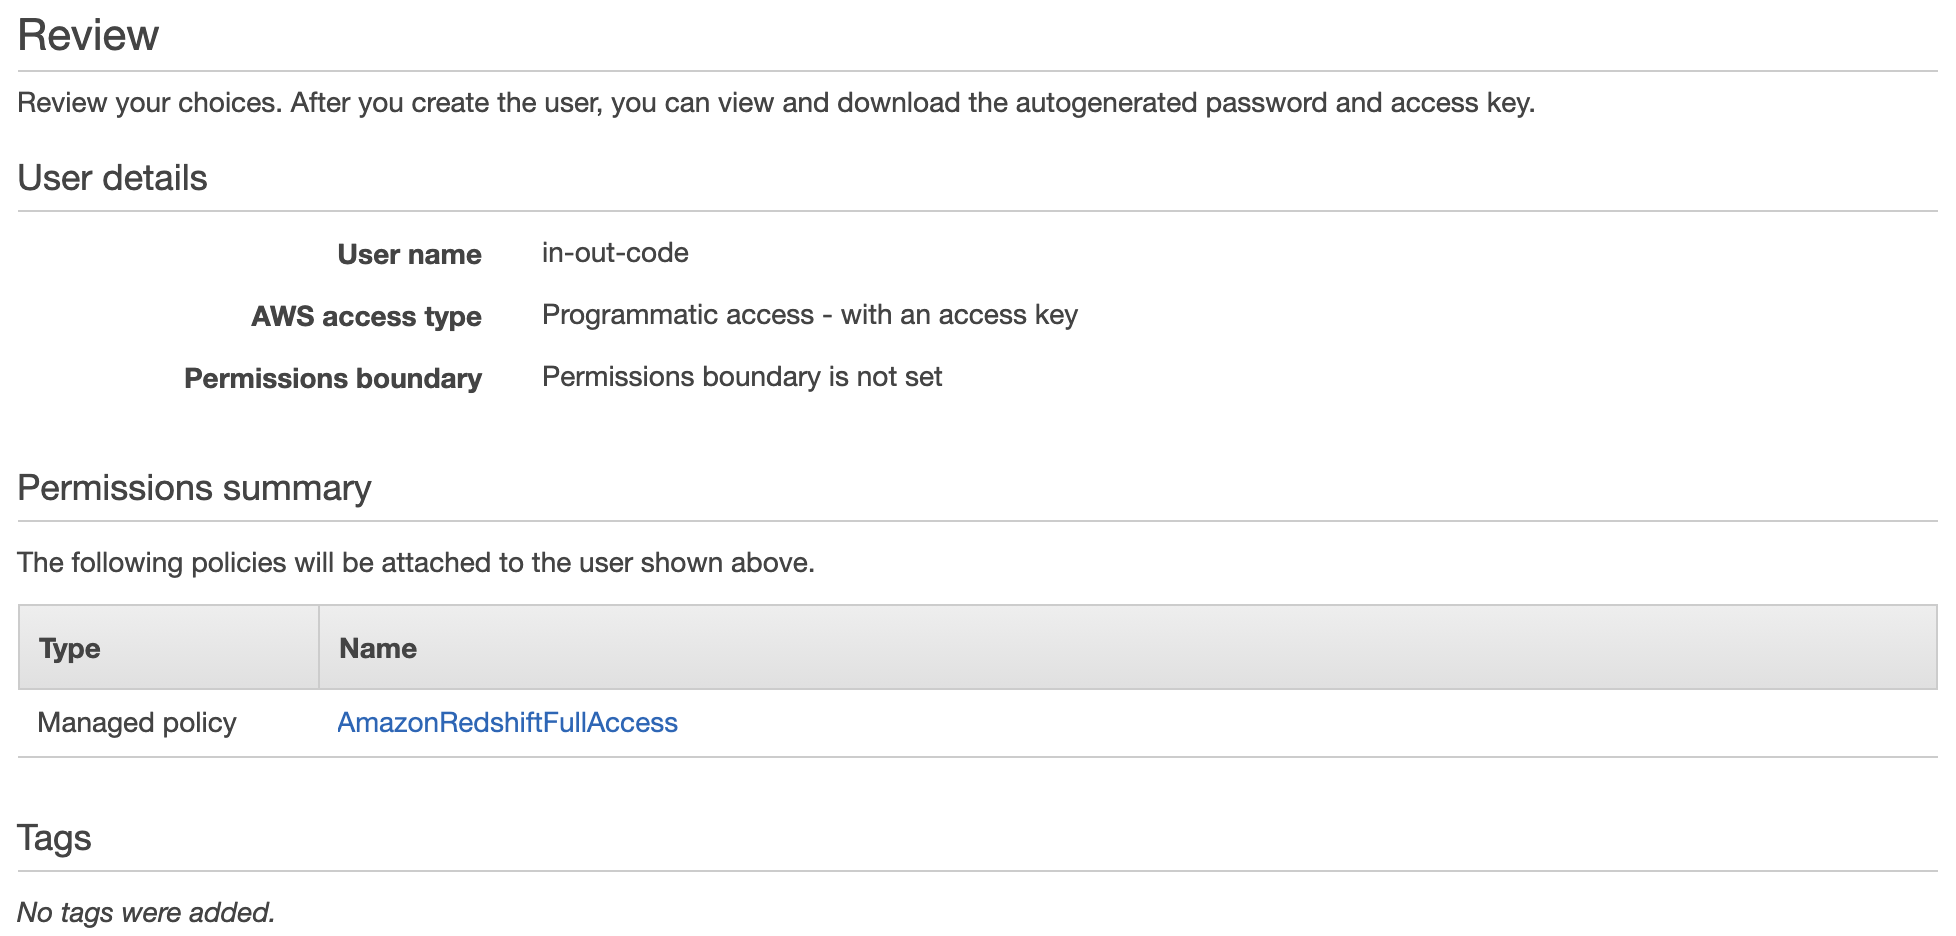
- Review your selections, then click Create User
- Below the Success message, click on Download.csv
- This downloads your credentials, including access key ID and secret access key. Store this somewhere safe
- Return back to your Amazon redshift service dashboard
- Your cluster should now be available
- Opening your cluster reveals three dropdown menus; Cluster, Database, and Backup
- Clusters cannot be stopped and resumed. When you’ve finished your work, or want to stop being charged, you’ll need to:
1. Create a snapshot of the cluster
2. Delete the cluster
3. Create a new cluster using the snapshot

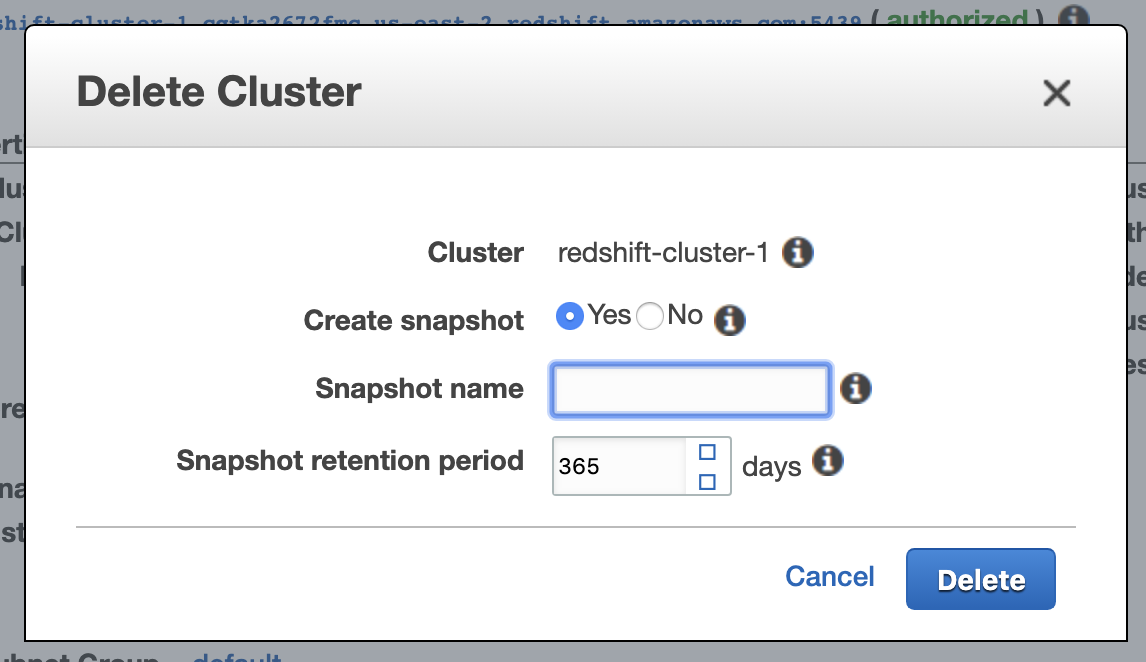

Command to generate a snapshot, then delete a cluster:
aws redshift delete-cluster –cluster-identifier
Command to restore a cluster from the snapshot:
aws redshift restore-from-cluster-snapshot –cluster-identifier
Snapshots incur S3 data storage charges, but it’s considerably cheaper than keeping the cluster up.
Step 6: Configuring DBeaver
- Download DBeaver from their website
- Install and open DBeaver
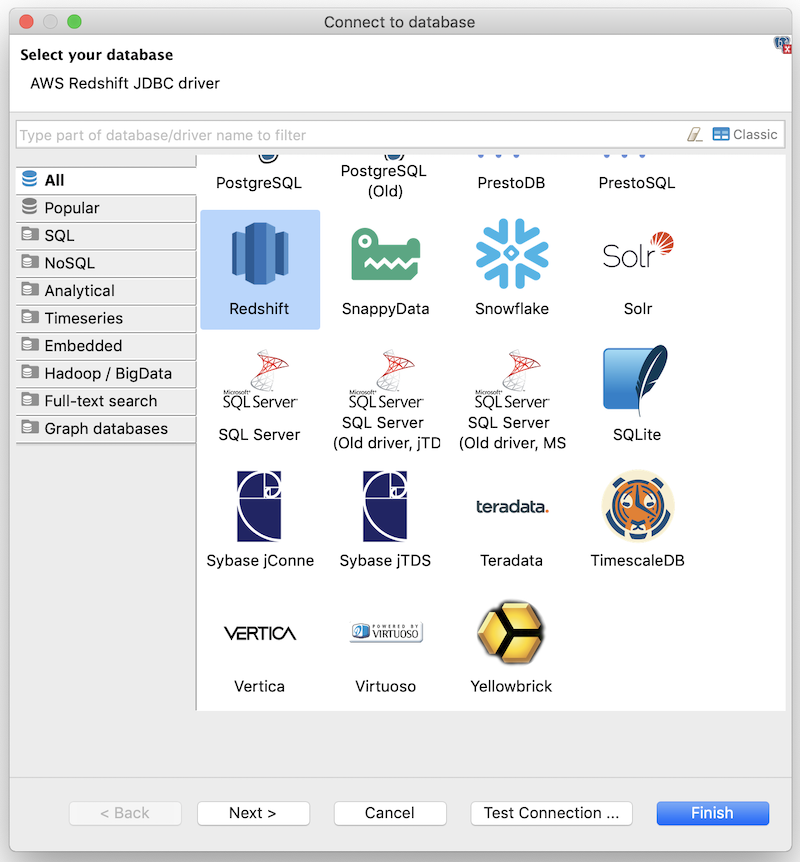
- Click on the Databases menu and select New Database Connection
- Click on All then select Redshift
- Click Next
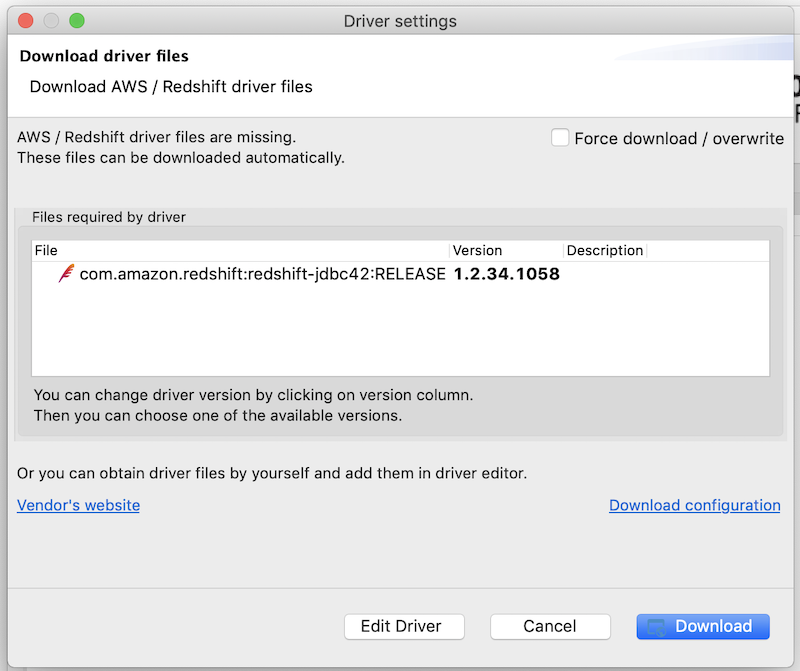
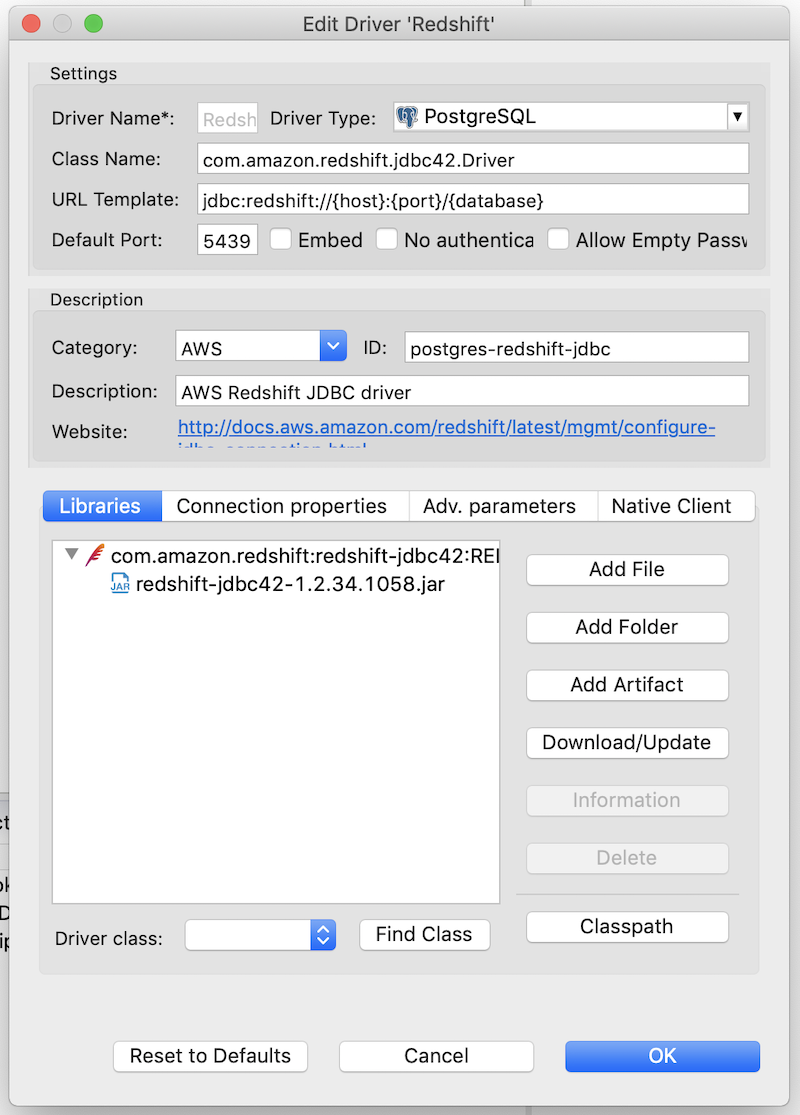
- Click Edit Driver Settings
- Click Download/Update to download the latest driver
- You should now see the .jar file under the Libraries tab
- Click OK
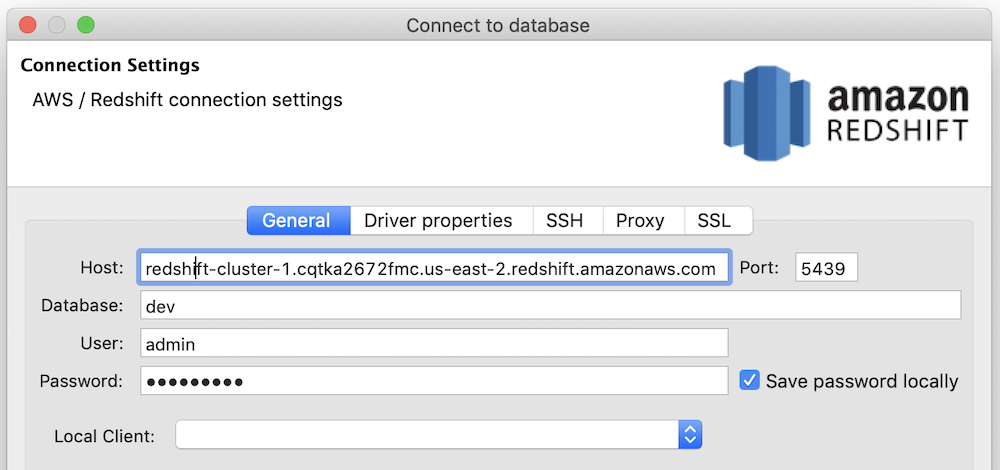
- On the General tab of the Connect to database window:
Host:section between //and:
Port: 5439
Database:
User:
Password: - The above information should be pulled from the configuration page of your cluster in AWS
- Click Test connection to ensure it’s successful
- Click Finish
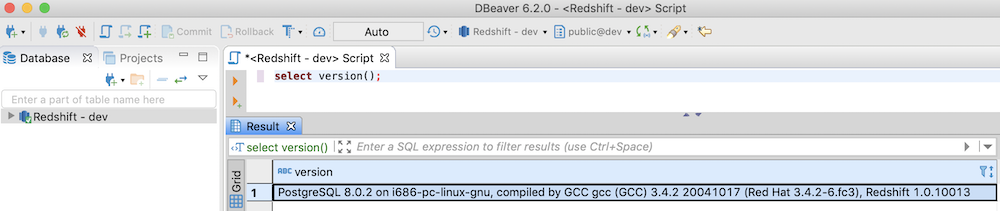
- Run
select version();from a query window to check the connection - This will show the version of Redshift you’re running, together with the Postgres version
Step 7: Load Data into S3
- From AWS, search for the S3 service
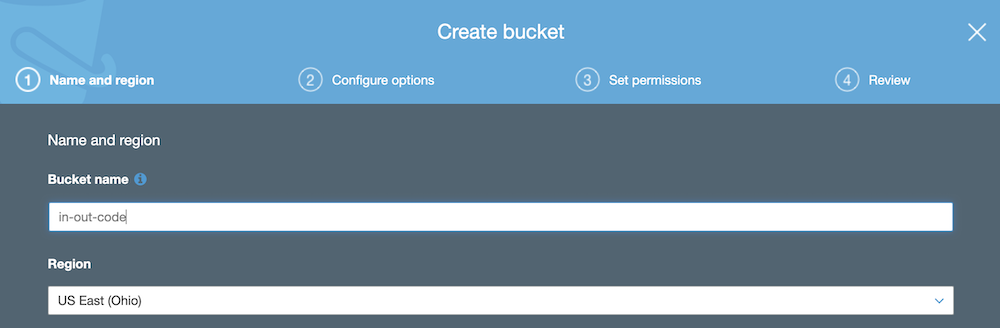
- Click on Create bucket
- Provide a globally unique name for your bucket
- Set the region to be the same as your Redshift cluster
- In Step 3: Creating a Redshift Cluster, we used US East (Ohio)
- Click Next
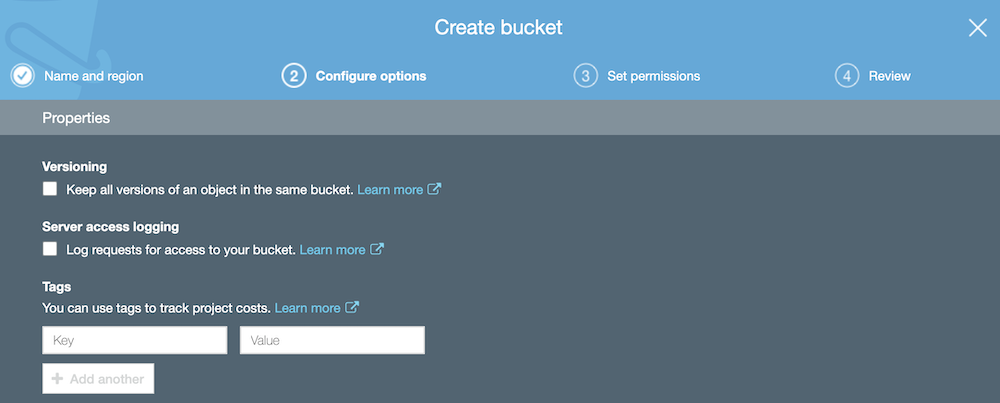
- For this guide, we won’t enable versioning or logging. Click Next
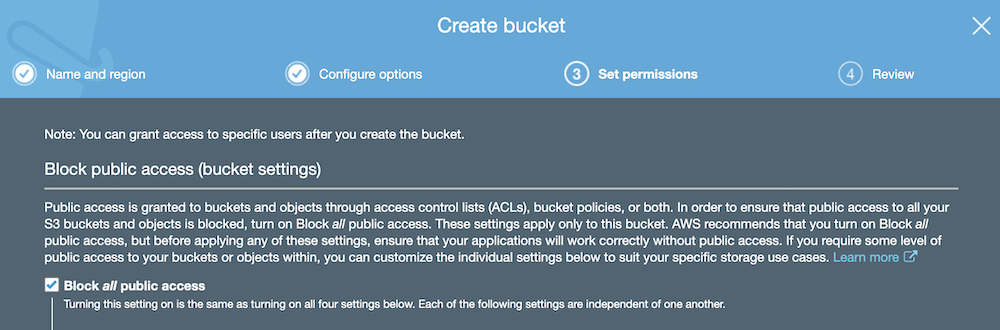
- At the Set permissions screen, select Block all public access
- Click Next
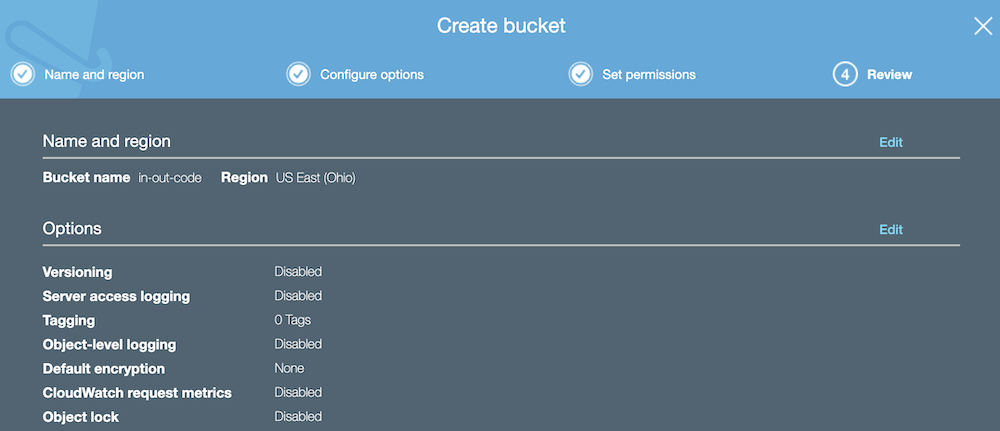
- Click Create bucket
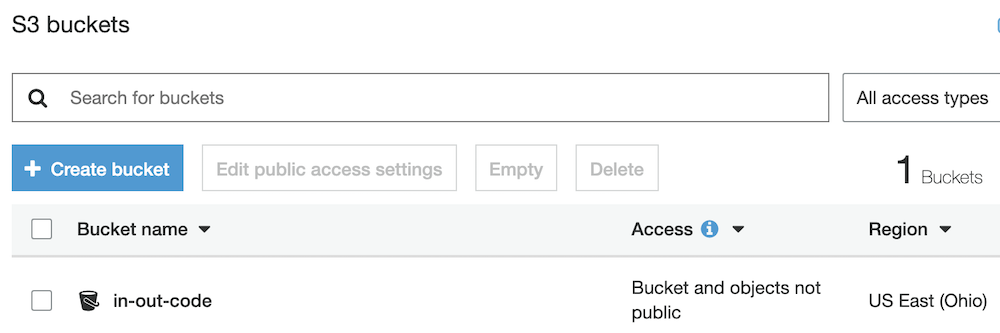
- At the S3 buckets screen, click on the bucket you just created
- Click Create folder
- Give your folder a name, then click Save
- Download the AWS Sample Files
- This will trigger the download of files for creating the database schema
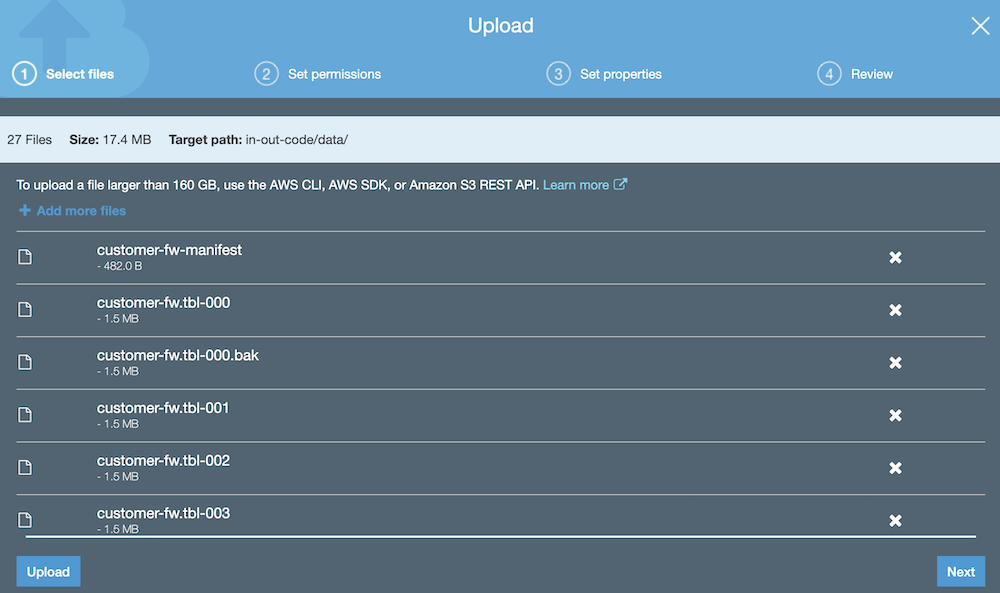
- From your Amazon S3 bucket folder, click Upload
- Drag the files from our unzipped folder into the Upload window
- Click Upload
- Each object is uploaded with a storage class of STANDARD
- You can find out more about what each storage class means here

Step 8: Loading Data into Redshift
Schema creation
- Run the following SQL from DBeaver to return a list of table names in Redshift:
select distinct(tablename) from pg_table_def where schemaname = 'public'; - Run the following SQL scripts to create our schema:
CREATE TABLE part
(
  p_partkey     INTEGER NOT NULL,
  p_name        VARCHAR(22) NOT NULL,
  p_mfgr        VARCHAR(6),
  p_category    VARCHAR(7) NOT NULL,
  p_brand1      VARCHAR(9) NOT NULL,
  p_color       VARCHAR(11) NOT NULL,
  p_type        VARCHAR(25) NOT NULL,
  p_size        INTEGER NOT NULL,
  p_container   VARCHAR(10) NOT NULL
);
CREATE TABLE supplier
(
  s_suppkey   INTEGER NOT NULL,
  s_name      VARCHAR(25) NOT NULL,
  s_address   VARCHAR(25) NOT NULL,
  s_city      VARCHAR(10) NOT NULL,
  s_nation    VARCHAR(15) NOT NULL,
  s_region    VARCHAR(12) NOT NULL,
  s_phone     VARCHAR(15) NOT NULL
);
CREATE TABLE customer
(
  c_custkey      INTEGER NOT NULL,
  c_name         VARCHAR(25) NOT NULL,
  c_address      VARCHAR(25) NOT NULL,
  c_city         VARCHAR(10) NOT NULL,
  c_nation       VARCHAR(15) NOT NULL,
  c_region       VARCHAR(12) NOT NULL,
  c_phone        VARCHAR(15) NOT NULL,
  c_mktsegment   VARCHAR(10) NOT NULL
);
CREATE TABLE dwdate
(
  d_datekey            INTEGER NOT NULL,
  d_date               VARCHAR(19) NOT NULL,
  d_dayofweek          VARCHAR(10) NOT NULL,
  d_month              VARCHAR(10) NOT NULL,
  d_year               INTEGER NOT NULL,
  d_yearmonthnum       INTEGER NOT NULL,
  d_yearmonth          VARCHAR(8) NOT NULL,
  d_daynuminweek       INTEGER NOT NULL,
  d_daynuminmonth      INTEGER NOT NULL,
  d_daynuminyear       INTEGER NOT NULL,
  d_monthnuminyear     INTEGER NOT NULL,
  d_weeknuminyear      INTEGER NOT NULL,
  d_sellingseason      VARCHAR(13) NOT NULL,
  d_lastdayinweekfl    VARCHAR(1) NOT NULL,
  d_lastdayinmonthfl   VARCHAR(1) NOT NULL,
  d_holidayfl          VARCHAR(1) NOT NULL,
  d_weekdayfl          VARCHAR(1) NOT NULL
);
CREATE TABLE lineorder
(
  lo_orderkey          INTEGER NOT NULL,
  lo_linenumber        INTEGER NOT NULL,
  lo_custkey           INTEGER NOT NULL,
  lo_partkey           INTEGER NOT NULL,
  lo_suppkey           INTEGER NOT NULL,
  lo_orderdate         INTEGER NOT NULL,
  lo_orderpriority     VARCHAR(15) NOT NULL,
  lo_shippriority      VARCHAR(1) NOT NULL,
  lo_quantity          INTEGER NOT NULL,
  lo_extendedprice     INTEGER NOT NULL,
  lo_ordertotalprice   INTEGER NOT NULL,
  lo_discount          INTEGER NOT NULL,
  lo_revenue           INTEGER NOT NULL,
  lo_supplycost        INTEGER NOT NULL,
  lo_tax               INTEGER NOT NULL,
  lo_commitdate        INTEGER NOT NULL,
  lo_shipmode          VARCHAR(10) NOT NULL
);
- Now run the table check SQL again, and we should see some results:
select distinct(tablename) from pg_table_def where schemaname = 'public';
- From the AWS IAM service, click on Users and open the user you created
- You should already have the AmazonRedshiftFullAccess policy
- Click Add permissions, then Attach existing policies directly
- Select the AmazonS3FullAccess policy, then click Next: Review
- Click Add permissions
- We can now load data from S3 into our Redshift schema
- Open the credentials.csv file downloaded earlier
- In the commands below, replace [ACCESS-KEY-ID] with your access key ID
- Replace [SECRET-ACCESS-KEY] with your AWS secret key
- Load dwdate:
copy dwdate from 's3://awssampledbuswest2/ssbgz/dwdate'
credentials 'aws_access_key_id=[ACCESS-KEY-ID];aws_secret_access_key=[SECRET-ACCESS-KEY]'
gzip compupdate off region 'us-west-2';
- Load customer:
copy customer from 's3://awssampledbuswest2/ssbgz/customer'
credentials 'aws_access_key_id=[ACCESS-KEY-ID];aws_secret_access_key=[SECRET-ACCESS-KEY]'
gzip compupdate off region 'us-west-2';
- Load lineorder:
copy lineorder from 's3://awssampledbuswest2/ssbgz/lineorder'
credentials 'aws_access_key_id=[ACCESS-KEY-ID];aws_secret_access_key=[SECRET-ACCESS-KEY]'
gzip compupdate off region 'us-west-2';
- Load part:
copy part from 's3://awssampledbuswest2/ssbgz/part'
credentials 'aws_access_key_id=[ACCESS-KEY-ID];aws_secret_access_key=[SECRET-ACCESS-KEY]'
gzip compupdate off region 'us-west-2';
- Load supplier:
copy supplier from 's3://awssampledbuswest2/ssbgz/supplier'
credentials 'aws_access_key_id=[ACCESS-KEY-ID];aws_secret_access_key=[SECRET-ACCESS-KEY]'
gzip compupdate off region 'us-west-2';
- You can check the tables are now populated using the following SQL:
select count(*) from LINEORDER;
select count(*) from PART;
select count(*) from  CUSTOMER;
select count(*) from  SUPPLIER;
select count(*) from  DWDATE;
This should return the following results:
Table Rows LINEORDER 600,037,902 PART 1,400,000 CUSTOMER 3,000,000 SUPPLIER 1,000,000 DWDATE 2,556 - To confirm the load happened, navigate to the Loads tab of your Redshift cluster
- If the load fails, you can find out why it failed by running the SQL below:
select query, substring(filename,22,25) as filename,line_number as line,
substring(colname,0,12) as column, type, position as pos, substring(raw_line,0,30) as line_text,
substring(raw_field_value,0,15) as field_text,
substring(err_reason,0,45) as reason
from stl_load_errors
order by query desc
limit 10;
- If you encounter any issues during the data loads, the best place to look for a solution is the official AWS documentation, which can be found here.
Data Load
Other useful SQL scripts:
-- View the last commit
select query, trim(filename) as file, curtime as updated
from stl_load_commits order by updated desc;
-- Check data distribution across tables. Each slice should have approx same number of records
select slice, col, num_values, minvalue, maxvalue
from svv_diskusage
where name='customer' and col=0
order by slice,col;
-- Check for disk spills
select query, step, rows, workmem, label, is_diskbased
from svl_query_summary
where query = [YOUR-QUERY-ID]
order by workmem desc;
-- Check distkey, sortkey, and encoding for a given table
select "column", type, encoding, distkey, sortkey, "notnull"
from pg_table_def
where tablename = 'lineorder';